1 · Buyer dashboard
First screen after seed. The dashboard shows the buyer's active intents with a rolling count of new offers. Offer counts are driven by the SSE stream — no refresh required.
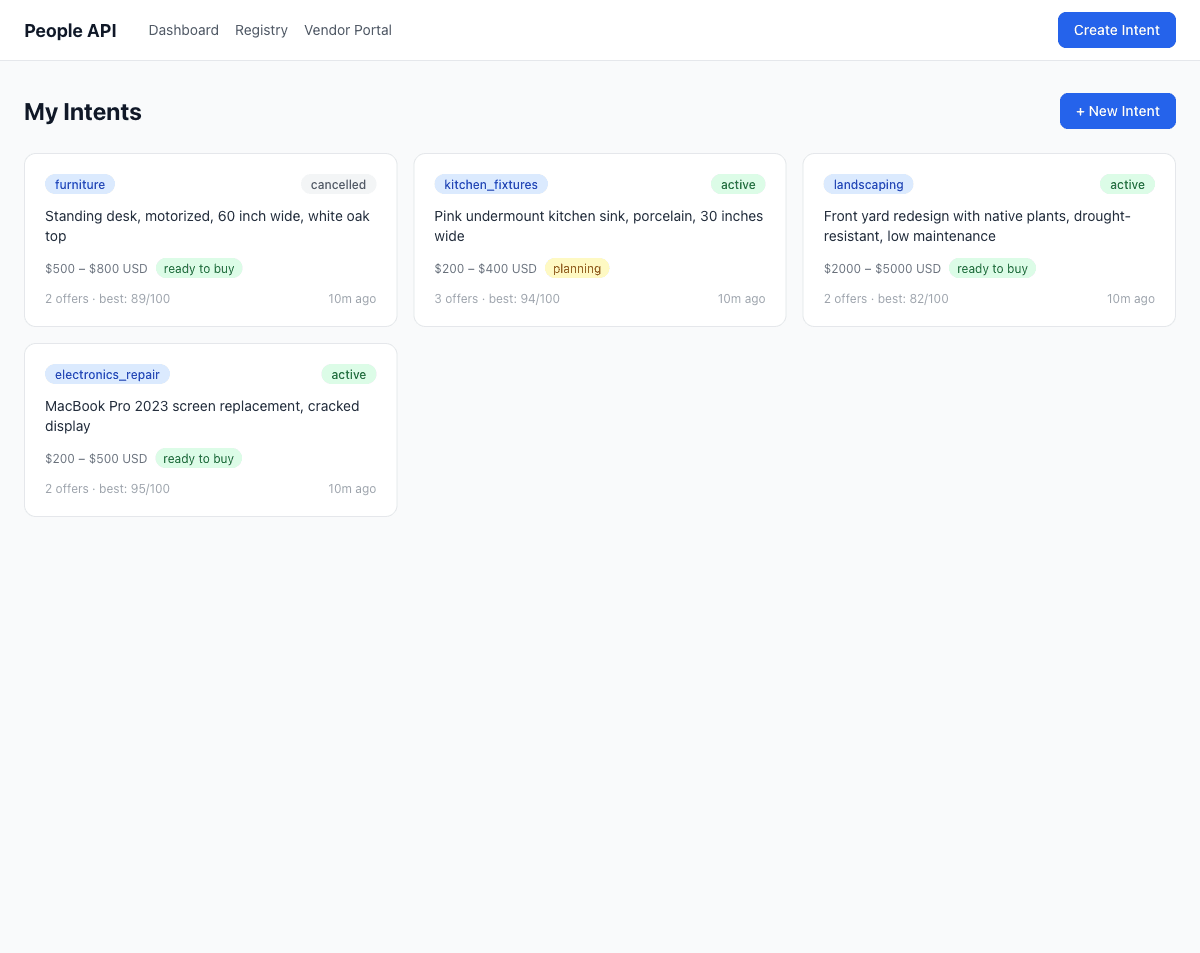 12
12- 1Active intent rows. Click to drill into offers.
- 2Offer count, live-updated via SSE.
2 · Intent detail
Click into an intent to see the ranked offer queue. Offers sort descending by score; auto-accepted offers sit at the top with a green badge.
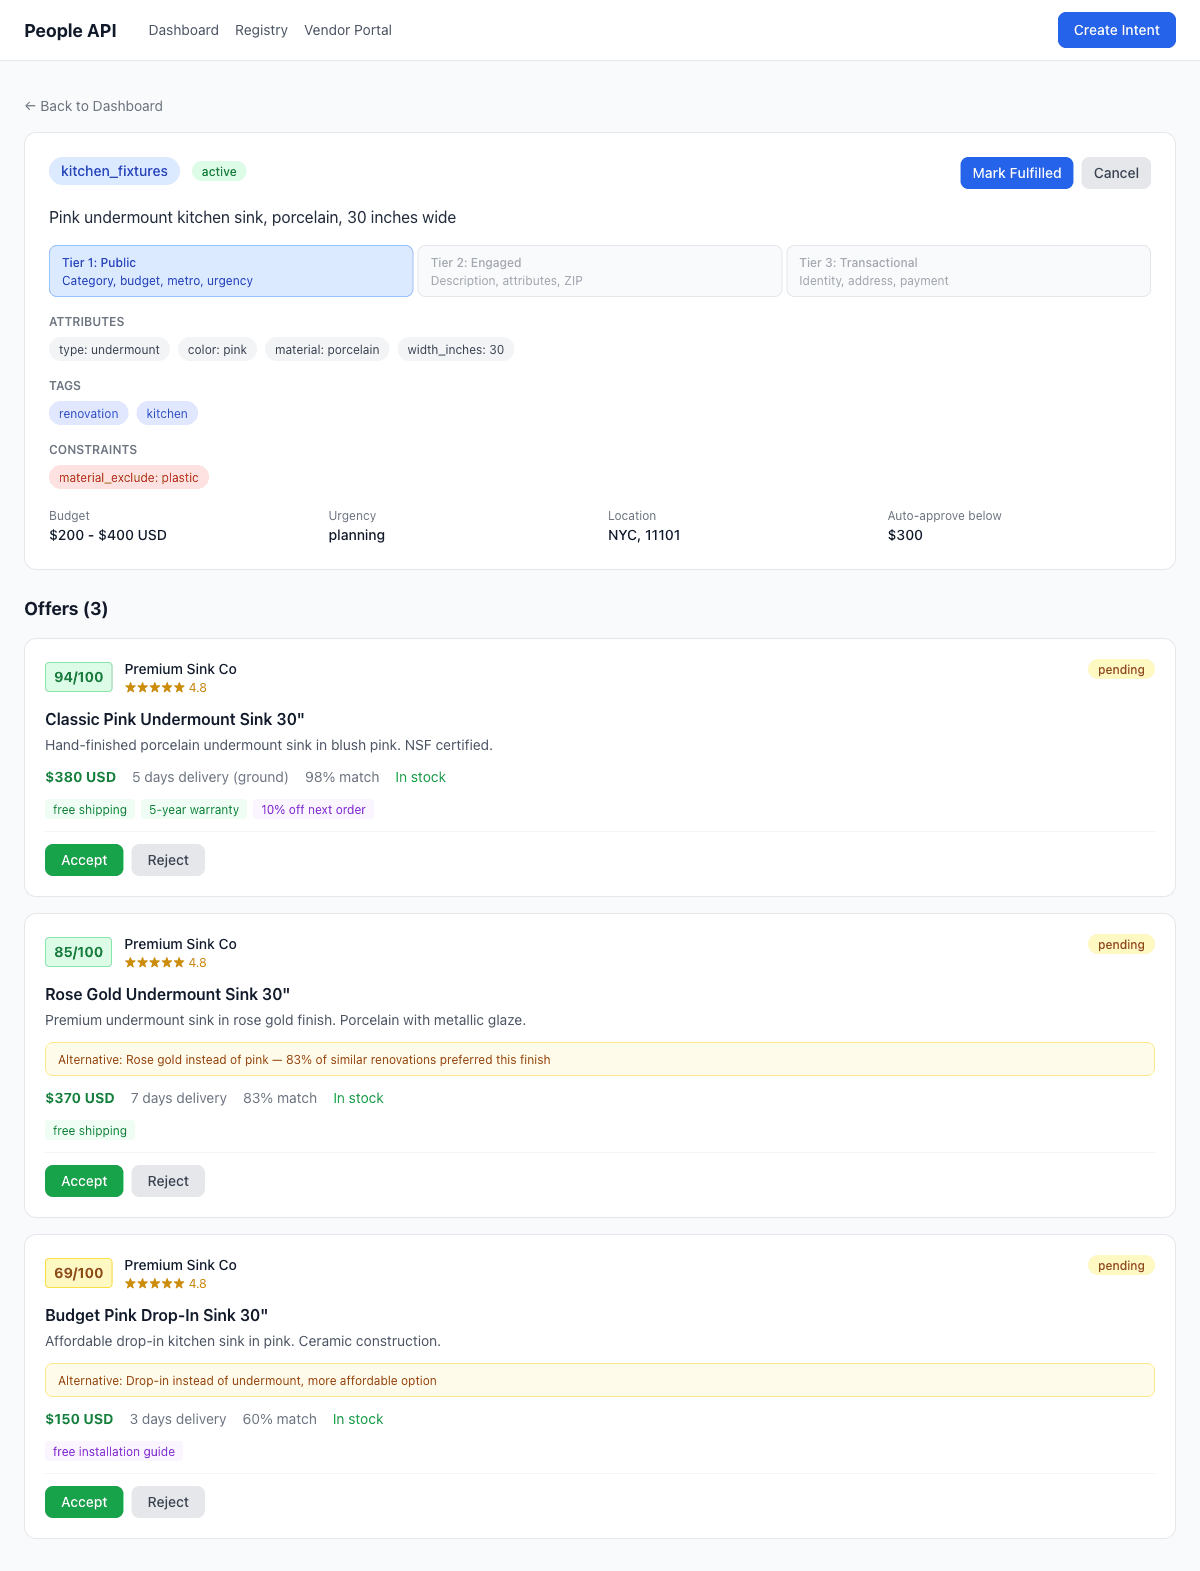 123
123- 1Intent summary — category, budget, urgency, metro.
- 2Server-computed score, color-coded.
- 3Counter-offer shown inline with the alternative reason.
3 · Create intent
A structured form — no free-text pitch. Each field maps directly to the Intent schema. The agent-generated version of this flow produces the same shape, without the form.
 123
123- 1Category and description — required.
- 2Budget min/max map to the protocol budget object.
- 3Auto-approve threshold — the gate for hands-off acceptance.
4 · Public registry
What a vendor sees. Tier 1 only — no descriptions, no ZIPs, no identities. Filterable by category, metro, and urgency.
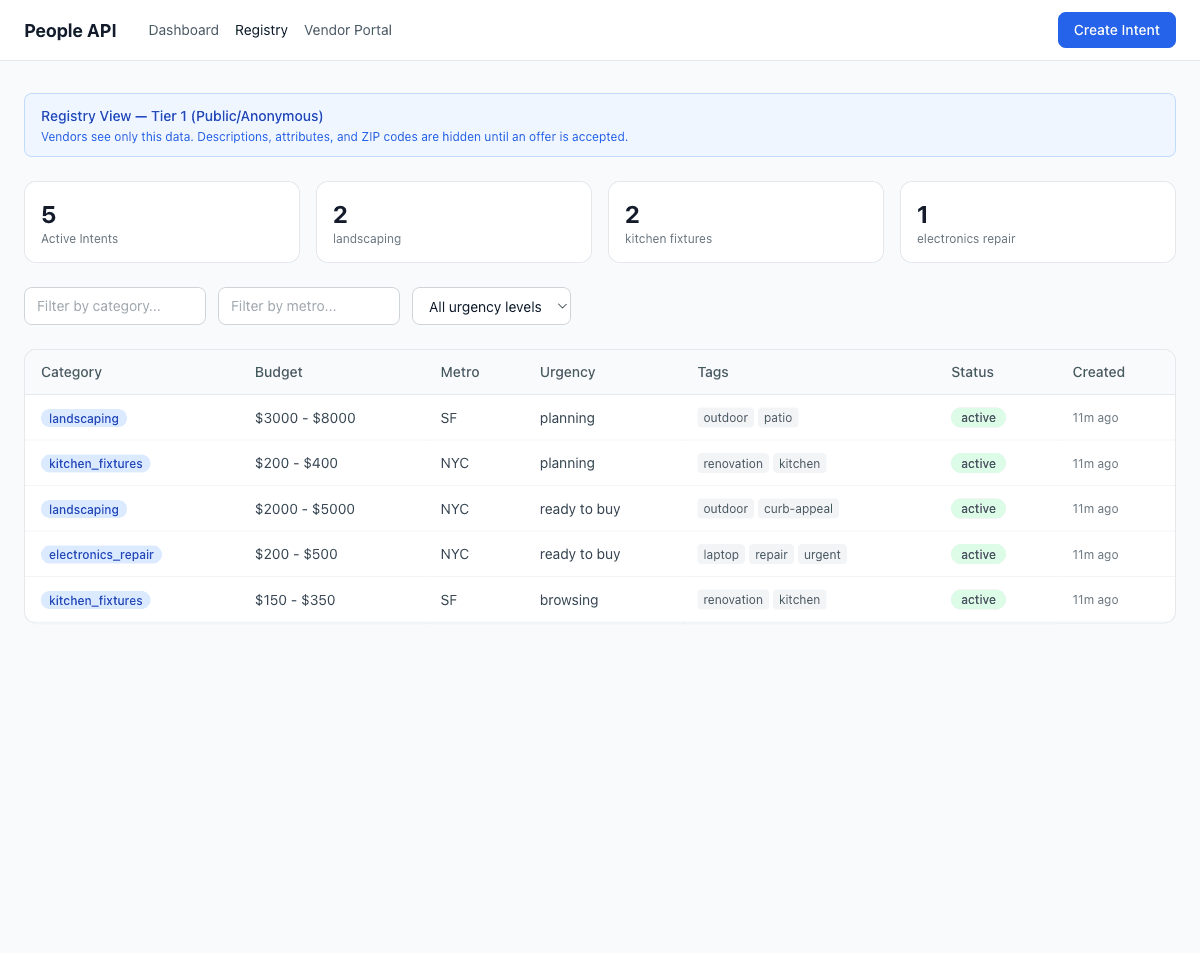 12
12- 1Filter bar — the only way to narrow a large registry.
- 2Tier-1 row. Category, budget band, urgency, metro, tags. Nothing else.
5 · Tier-2 locked
Click a registry row without a session token and the locked modal appears. It's the privacy model made tangible — the data isn't hidden by CSS, it isn't in the response at all.
 1
1- 1Locked modal — explains why, not just what.
6 · Register a vendor
The minimum a registry needs to resolve an offer: name, email, categories. The API key is generated server-side.
 1
1- 1Categories — used to route intents into a vendor's browse view.
7 · API key, shown once
Standard security affordance: the plaintext pak_… key is shown once at registration with a copy button. After this page, only its hash is retained — the registry cannot show it again.
 1
1- 1Copy button — last chance. The server only stores the hash.
8 · Vendor dashboard
The vendor's view of submitted offers. Status chips reflect protocol state — accepted (auto or manual), pending, rejected, or countered.
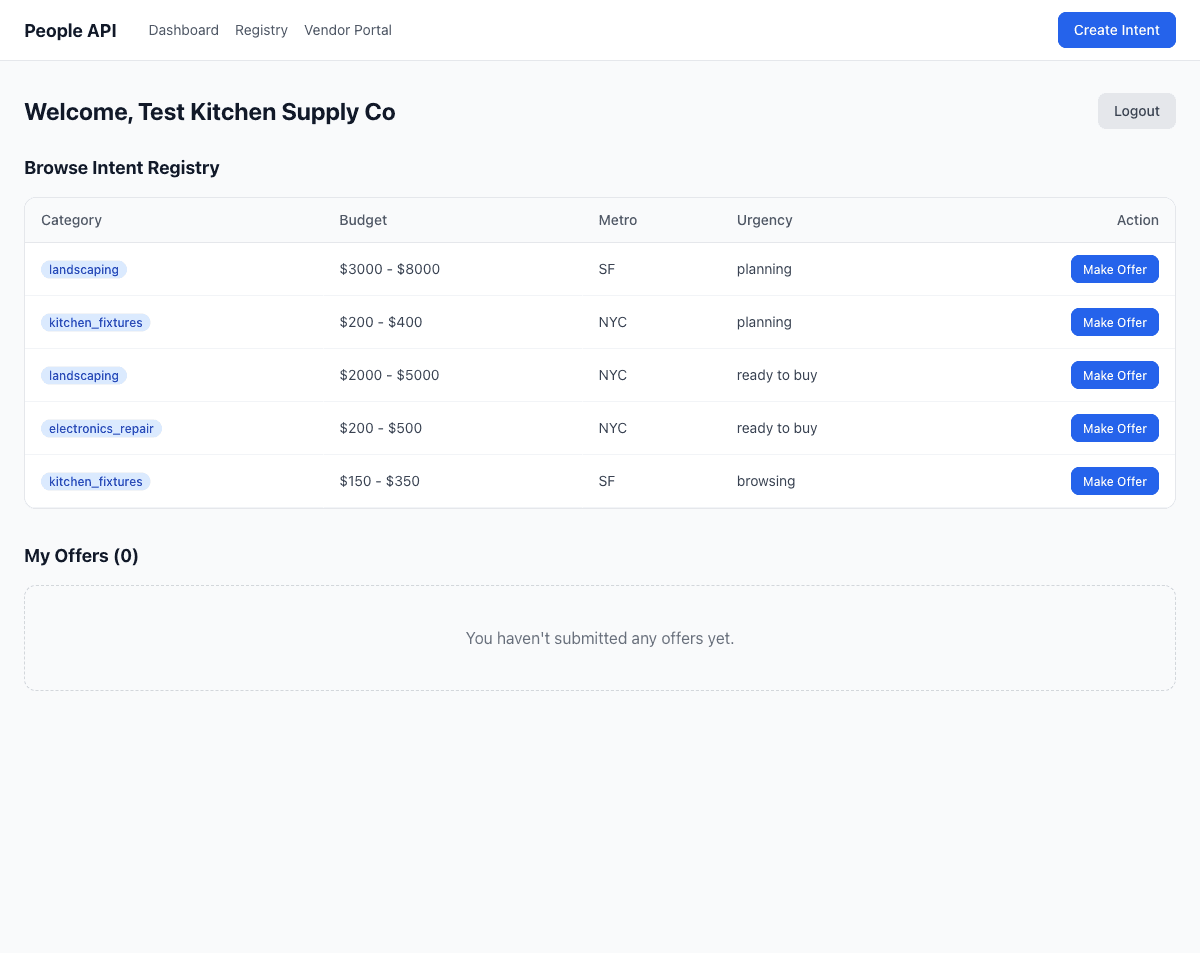 12
12- 1Offer row — stays here until the buyer responds or the offer expires.
- 2Status chip, kept in sync via SSE.
9 · Offer form
Structured offer submission. Attributes mirror the intent's attribute keys, so a vendor can't accidentally omit a field the buyer cares about.
 123
123- 1Price, delivery, stock — the numeric backbone of the score.
- 2Attribute fields — auto-populated from the intent shape.
- 3Alternative toggle — legalizes counter-offers with the -5 penalty.
10 · Offer submitted
Immediate feedback. The server has scored the offer and returned a decision: accepted, pending, or rejected with reason. The vendor sees the score in the same response.
 12
12- 1Server-computed score returned in the response.
- 2Decision badge — accepted, pending, or rejected reason.
11 · Live update, buyer side
Back to the buyer's intent detail. The new offer has appeared in the ranked list without a page refresh — SSE pushes the event, the UI refetches the affected slice.
 12
12- 1New offer has appeared at the top of the ranked queue.
- 2Auto-accepted — buyer's attention stays on the next decision.
Run it yourself
Three commands from clone to live dashboard.
quickstart.shgit clone https://github.com/pranavred/peopleapi.git
cd peopleapi
npm install && npm run build && npm run seed && npm start
# → server on http://localhost:3000
# → SPA served from the same origin